Editing or Disabling a Sub-Merchant
If you wish to edit a sub-merchant due to validation errors or otherwise, use the Edit Sub-Merchant function from the View Sub-Merchant screen to perform this operation. If you wish to suspend all processing activities of a sub-merchant, use the Disable function (see Disabling a Sub-Merchant).
When editing a sub-merchant, you cannot completely remove data by blanking out an editable field. It may appear that it has been removed from the Portal, however the information is not (and cannot be) removed from the underlying data record for the sub-merchant.
To edit fields for an existing sub-merchant:
-
Follow the steps outlined in Searching for Sub-Merchants.
-
From the Search Results panel, double-click the row for the desired sub-merchant. The View Sub-Merchant screen appears, as shown in Viewing Sub-Merchants and Legal Entities.
-
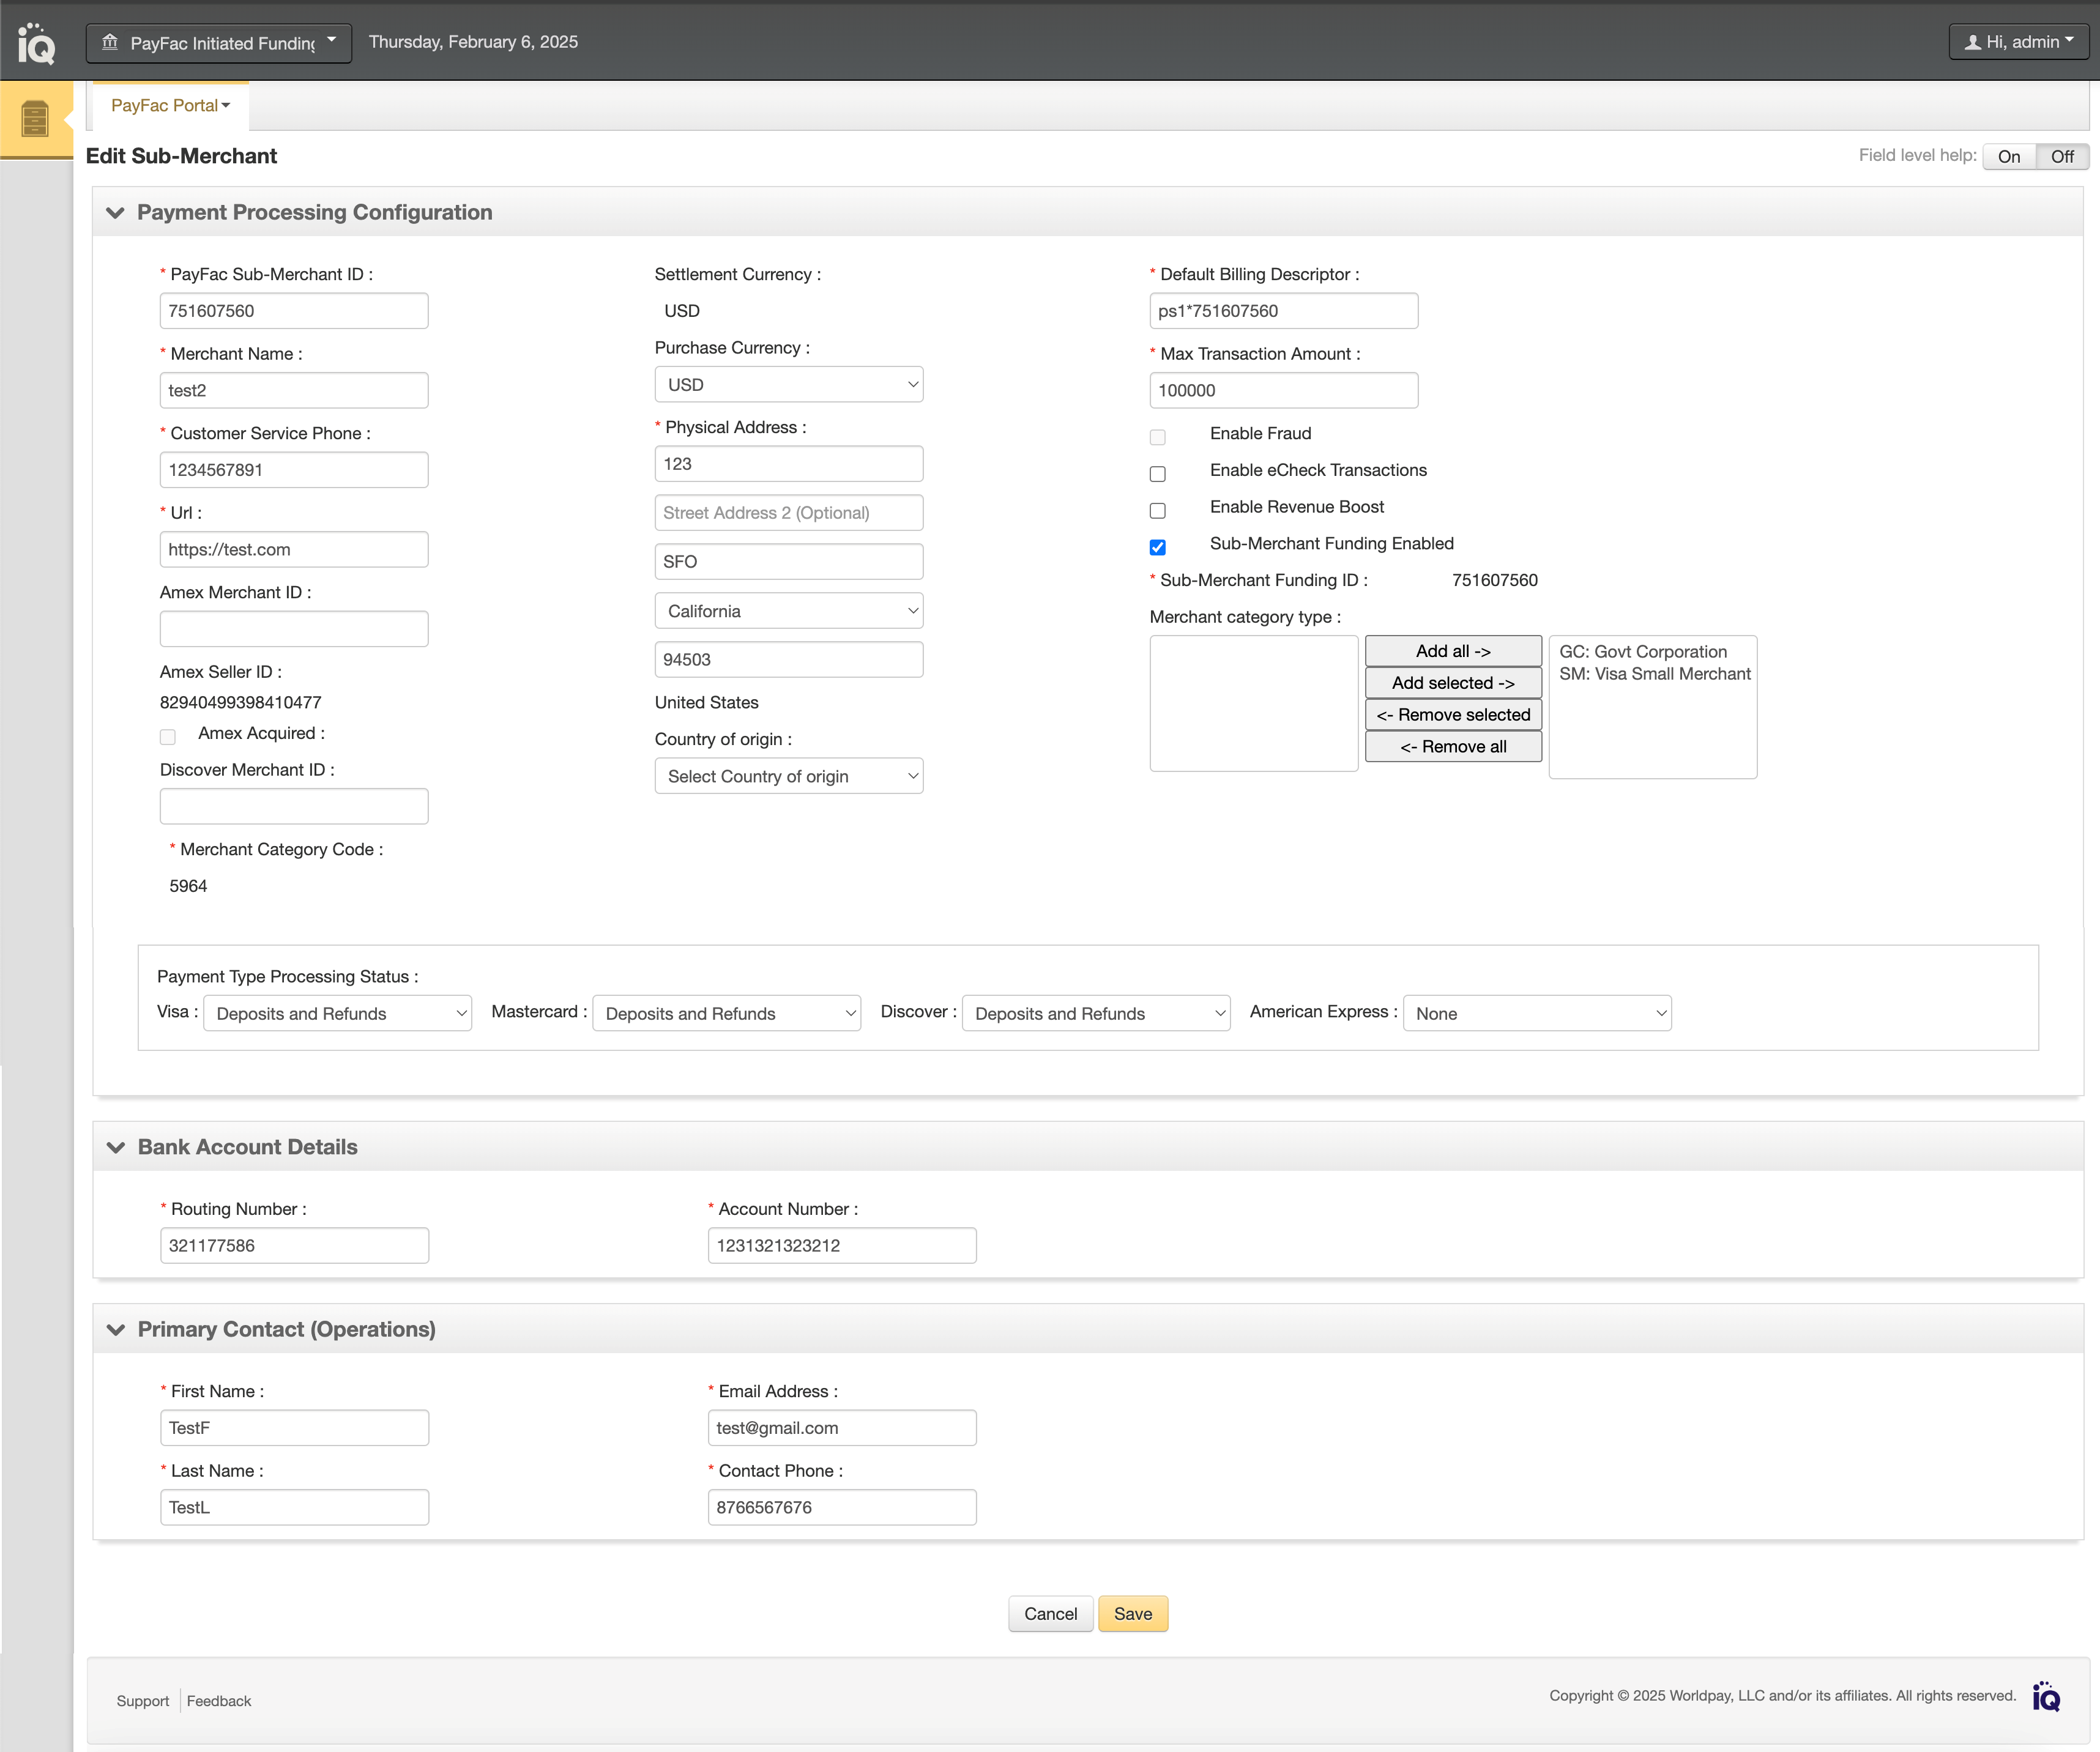
Click the Edit button on the top right of the page (see Sub-Merchant Summary Panel). The PayFac Portal displays the Edit Sub-Merchant screen. The Portal displays editable fields as input or drop-down boxes; non-editable fields are text only, as shown below.
-
Re-input the necessary fields and click Save at the bottom of the page. Required fields are marked with an asterisk (*).
A manual review may be triggered if you edit certain fields when the legal entity is in Retry status. See Manual Review Triggered When Editing These Fields for a list of those fields.
Disabling a Sub-Merchant
If you wish to suspend all processing activities of a sub-merchant, use the Disable function to perform this operation.
Disabled sub-merchants can no longer process transactions. Additionally, associated chargeback cases can no longer be assigned or worked, and Dynamic Payout funding instructions can no longer be sent for the MID. Disabled sub-merchants cannot be re-enabled.
To disable a sub-merchant:
-
Follow the steps outlined in Searching for Sub-Merchants.
-
From the Search Results panel, double-click the row for the desired sub-merchant. The View Sub-Merchant screen appears, as shown in Viewing Sub-Merchants and Legal Entities.
-
Click the Disable button on the top right of the page. The PayFac Portal displays a warning message confirming that you wish to disable this merchant.
Disabled merchants remain in our system with the status ‘Disabled.’ You can continue to view a disabled merchant, but you cannot re-enable the merchant.
The PayFac Sub-Merchant ID changes to reflect the disabled status and date. For example: PayFac Sub-Merchant ID Merchant_25 becomes d_Merchant_25_2015_04-14.54.02.
-
Click Disable.